Monday, August 26, 2013

Fun, Quirky & Time-Saving DIY Tips :)

I love that I have been able to turn to the Internet, specifically YouTube, many times when I have been stuck with something I can't fix or wanted to learn how to do myself.  The Internet is a great resource for such topics, but it can also be a challenge to find the answer if you don't even know what you are looking for.

I surf the Internet pretty much daily, mostly about makeup, beauty or fashion, but I also use it to learn and find some useful information.


Listed below are a few tips and things I have found that I wanted to share that have saved me time and have also saved me from NOT wasting additional energy, rage, anger and most of all my sanity! ;)


1. Ipod has frozen while charging

This has happened to me more often than I care to admit. Each time this has happened I will panic, get stressed out and then remember, "Oh yeah, I fixed this with that YouTube clip". So here is the clip that I found that has helped me with my Ipod Nano: http://www.youtube.com/watch?v=4JEgr1Xfj4s


2. How to create an instant snack bowl

Sometimes when you have people over, and it is a more casual setting, or even if you are alone this neat folding technique is awesome!  This makes any snack bag into a bowl for you, in less than a minute, check it out: http://www.lifehacker.com.au/2010/04/create-an-instant-snack-bowl-from-any-snack-bag/


3. Protect your shoes when travelling

This one might sound odd, but it is a great tip to protect your shoes and your clothes when travelling. I came across this tip here: http://www.realsimple.com/new-uses-for-old-things/new-uses-travel/shower-cap-00000000014397/index.html

4. Easy way to clean your closet
Turn your closet hangers the opposite direction.  As you wear each item, turn the hanger the correct side.  By the end of the week, you will notice which items you are wearing and which items are just staying untouched.  By the end of a few weeks, you will know exactly what to purge from your closet to help keep it clear and organized. Whatever is not being worn, you can donate :)

5. Cork Board Jewellery Organizer
My challenge has always been on how to keep all my necklaces from tangling into one another. Keeping them in a drawer or a jewellery box does not work! Also, I want to be able to find the item quickly.  The cork board has definitely helped me out and makes it much more fun to get ready in the morning.  I can't recall where I originally saw the inspiration for this, but I did my own post version: http://www.makeupbysand.blogspot.ca/2011/12/mini-haul-of-week-diy-jewellery.html 


Hope these tips and tricks work for you! I will be doing this post again covering time saving tips for attending a party and amazing beauty tips and tricks, all that help save time and money, stay tuned!

Always Smile :)  - Sand

Thursday, August 8, 2013

My childhood dream realized - Coach Barbie!!!


For those who know me, the ones who know me really well, know that I love Barbie. I had only one and I enjoyed her sense of fashion, her makeup look and of course her accessories!

It was extremely exciting to hear that my beloved Barbie was getting her own Coach bag! The COACH  brand gave BARBIE a high-fashion makeover, and indeed they did!

COACH teamed up with Mattel to launch this collector's edition version of the famous doll. This Barbie sports the following miniature accessories that any Coach loving fan would want to covet: 

Photo courtesy:  http://www.vogue.co.uk/
  • a miniature classic checked Tattersall trench coat
  • Sandals, Sunglasses, Striped top with a Suede skirt - these were all featured on the brand's actual Spring/Summer 2013 collection
  • The Coach Duffle bag - made with genuine leather has been created in the same factories and with the same materials as Coach's life-sized consumer handbags. 
Only a limited number of this doll were made, and it has already sold out, but for those who are not able to get this doll, enjoy these amazing pictures of the Coach Barbie (courtesy of Vogue UK/Coach):

Photos courtesy: http://www.vogue.co.uk

Photo courtesy:  http://www.vogue.co.uk
This news and these images definitely put a smile on my face!

Always Smile :)  - Sand

Saturday, July 6, 2013

Everyday Smokey Eye :) - Instagram Inspired Tutorial


I was inspired by Instagram and all of the beautiful collage photos by various makeup artists showcasing their gorgeous eye makeup.  I found these photos not only inspirational, but very easy to understand their "how-to" photos.  

I thought it would be fun to showcase one of my favourite looks to wear in the same fashion as well as including the step by step instructions.   Enjoy this post!

Instructions:

Step 1 - To frame the eyes, fill in the brows, I used Vasanti Dynamic Brow Duo in Cape Town.
Step 2 - Apply SIN on 1/3 of the inner lid and up into the crease. You want to press and pack onto the lid.
Step 3 - Apply SIDECAR on the rest of the lid. Sweeping the colour and blending it into SIN.
Step 4 - Then apply NAKED & BUCK mixed together and sweep into the crease, blending very well.
Step 5 - Apply VIRGIN, the perfect shade to highlight under the brows onto the brow bone.
Step 6 - Using CREEP, start at the corner of the eye, lightly pat and sweep this shade into the crease.
Step 7 - Using Makeup Forever Eye Pencil in Black, apply to the inner waterline.
Step 8 - I used Kajal Extreme eye pencil underneath the end of the lower lash line and smudged to soften.
Step 9 - Create a cat eye by drawing a thin line on top of the lash line and winging out.
Step 10 - Apply 2 coats of Mascara, helps to open and define the eyes.
Step 11 - For added sparkle and pop, add SIN the inner corner of the eyes.

Products Used:


Finish the rest of your face as you like! This is a perfect dramatic yet wearable smokey eye that is great for the weekend or a glam night out!

Hope this post helps you re-create this sexy look.  Here is the finished look:


Always Smile :)  - Sand

Sunday, June 30, 2013

Sunday Smiles :) - It's all about COLOUR!!


I am so excited that Summer is here and we finally get to see colourful things in nature, in fashion and of course makeup.  I painted a colour wheel many years ago for a school art project.  What was really neat about this wheel is that you could easily understand which colours looked great together and which ones were complementary to one another as well.

Today I wanted to post fun photos that were inspired from the Colour wheel.  Check them out below:

Shade - RED | OPI Nail Colour - "Colour So Hot it Berns" :)


Shade:  Turquoise | Indian Outfit + Scarf


Shade:  Yellow | Indian Outfit + Summer Dress


Shade:  Teal Blue |  Makeup Bag + Floral Print Dress

Find your colour inspiration from this wheel, whether it be your nails, fashion or makeup :)

Always Smile :)  - Sand

Saturday, June 8, 2013

Just in time for Summer - My Ombre How-To :)

I love that Summer is just around the corner and with it comes beautiful sunny days, visits to the beach and family BBQ's. The Summer months encourage everyone to be outside, so I always look to change my makeup as well as my hair before the Summer starts.  


Ombre is a trend that I remember noticing in Nails, Fashion, Makeup and Hair for the last few years.  Thanks to Instagram and Pinterest, we get to see some amazing photos of these trends. What is amazing about this trend is that it is very wearable and you can tailor it to your flavour and comfort.

Ombre Hair, I first noticed on an episode a few years ago on Y&R, on the character Victoria Newman, and found it very interesting.  I wasn't sure if I was in love with it at first, but I did find it unique on Victoria.  Over the last few years, the Ombre hair trend took off and now it has become a staple hair colouring option for women in salons and now at home!

I wanted to see if this could be easily done at home and tried a few options.  I am budget conscious shopper and wanted to share an easy and affordable option to achieve this hair trend. But I had to test it out first.  Here is the first attempt to At-Home Ombre.

Attempt 1:

I opted to use a very light blonde shade in regular box colour option, so I choose L'Oreal Superior Preference in #48 Copper Blonde:


This shade was a lot lighter than my own hair so I thought that this would work well, here is a pic of my before hair:


However, it didn't work as well as I would have liked.  It gave a great warm tone to my hair but did not lighten it enough to allow for the more intense Ombre effect that I was going for.  

Attempt 2:

So I went back to the Drug Store and picked up a box of L'Oreal Feria Wild Ombre for Dark Blonde to Light Brown Hair in #070:


There are a few variations available from Wild Ombre, but from all the research I did online and on YouTube, this one provided the lift and lightness I was looking for. This worked perfectly and here are the steps and items you will need to do this at home:
  • 1 Garbage Bag T-shirt
  • Butterfly Hair Clip
  • Hair Brush
  • Towels
  • Old T-shirt and Bottoms (Trust me you will thank me later)
  • Timer
You want to make sure wherever you are going to colour, that you have taken the precautions to cover and remove items that could get damaged by the bleach in this product.  What makes this hair kit unique is that it comes with a unique comb that allows for proper distribution of the bleach mixture.  

With patience, I powered through, and did it in two sections, a put the top section of my hair up, moved the loose hair forward and started doing 1 inch sections at a time.  First applying it with the mixture, and then massaging it in with my fingers.  Smoothly and quickly I did the first sections of hair on both sides, and then loosened the top section and repeated the same steps of application.  Then I waited and saw the transformation happening in front of me, so after 15 minutes I removed the mixture and was very happy with the outcome.

Things to be aware of:
  • Be mindful of the time so that it doesn't over process
  • Keep your gloves on until you have removed the product from your hair
  • Read the instructions carefully on discarding the items used to dye your hair
  • Avoid being too even, otherwise you will get a harsh line vs. a blended effect

Now because dark hair can result in reddish/coppery tones, you can always tone your hair the same day using any ash blonde shade, which will result in caramel/mocha toned ombre hair. Good luck and have fun doing this at-home!

Always Smile :)  - Sand

Sunday, May 26, 2013

Perfect Lips for the Summer :)


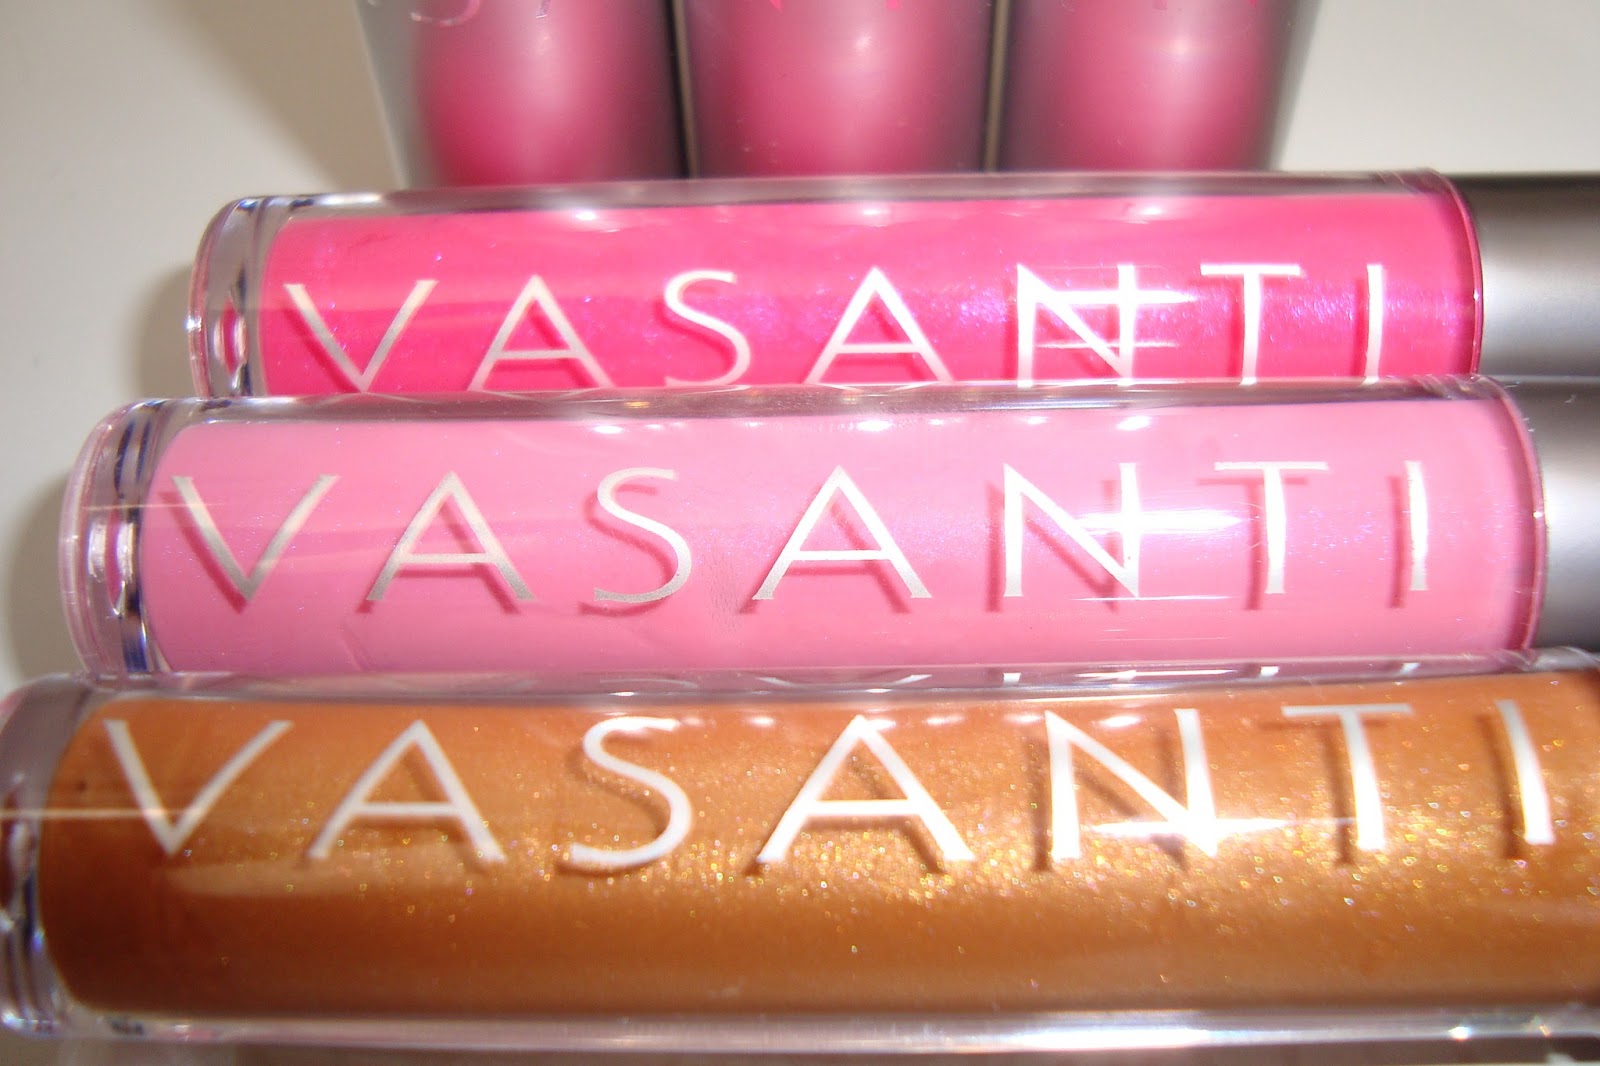
In addition to the 3 new Lipstick shades, Vasanti Cosmetics also launched 3 NEW Lipshines.  These glosses are Vitamin E infused and leave a beautiful sheen of colour and are not sticky.  These colours in this formula are essential to your Beach Makeup Bag!


Lipshine Shades:  Gold Nile - Asov Rose - Darling River

Golden Nile is a sparkling gold shade that you can wear everyday, reminds me of a sparkling sunset!

Asov Rose is such a sexy shade with no shimmer but adds an extra pop to any bold lipsticks! Great for the bold and daring personality.

Darling River is a soft shade with no shimmer, offers high shine and is very pretty and a romantic shade. Perfect for a night on the board walk or a late night stroll on the beach.


Which shade would you wear for the Summer?

Always Smile :)  - Sand

Saturday, May 25, 2013

Hot NEW Lip Products for the Summer! :)


I am a huge fan of lipsticks! If you know me you will know that I have always loved wearing lipsticks.  I started out opting for nude shades, then graduated to finding and wearing the newest trend for lips.  Starting out with Nude/Earthy toned lips, then moving onto to the lined lip, then venturing into pinks, I have finally arrived to my current trend favourite:  BOLD and Bright lips!!

I was so happy to find out that Vasanti Cosmetics was coming out with new shades to add to their Lipstick and Lipshines.  I finally got my hands on them and I am very happy!  

Take a look at the pics and swatches below:

Meet Pretty Poland, Hot Brit & Cool Aussie :)

And their friends Asov Rose, Darling River and Golden Nile :)


Here are my lip swatches below:

A warm pink shade, great for everyday wear.

A Sexy Hot shade - great for a night out ;)
A cool baby doll pink, great to pair with a dramatic eye!


These shades are a great addition to your lipstick collection and look even better in person! My next post will feature the Lipshines. 

Be sure to check out these new shades before the Summer officially kicks off!


Always Smile :)  - Sand